| Now that “applepie” (my very first Raspberry Pi) is set up, it is time to have a little fun. The first hacks will be to turn the device into a cheap (but nonetheless quite efficient) AirPlay / AirPrint device, while baking a real Apple Pie… |  |
Setting up AirPlay
First, I hooked up the Raspberry Pi to Altec Lansing powered speakers through the Jack connector.
Next, one has to force audio output to stereo jack (Raspberry PI defaults to HDMI audio output):
1 2 3 4 | apt-get update apt-get upgrade apt-get install alsa-utils amixer cset numid=3 1 |
The result can be easily tested:
1 | aplay /usr/share/sounds/alsa/Front_Center.wav |
.. and I could hear the phrase “Front, Center” coming out from the speakers.
Then, one has to setup Avahi and Shairport.
Avahi is a free (as in free speech) implementation of Apple zeroconf / bonjour protocol, including a system for multicast DNS/DNS-SD service discovery. It is licensed under the LGPL and included in the Raspbian distribution. Thus, the installation of avahi is quite easy:
1 | apt-get install avahi-deamon avahi-utils |
Shairport, on the other hand, is not packaged with the Raspbian distribution. It has to be built from sources.
Let’s install all Shairport dependencies:
1 2 | apt-get install git libao-dev libssl-dev libcrypt-openssl-rsa-perl libio-socket-inet6-perl libwww-perl cpanminus make libavahi-client-dev cpan Net::SDP |
Then get Shairport’s sources
1 2 3 4 | cd /opt mkdir airport cd airport git clone https://github.com/albertz/shairport.git shairport |
Let’s compile and install Shairport :
1 2 3 4 5 | cd shairport make make install cp shairport.init.sample /etc/init.d/shairport update-rc.d shairport defaults |
Edit the default startup configuration file (/etc/init.d/shairport) and define the name of your AirPlay device (change the “NAME” variable):
1 | vi /etc/init.d/shairport |
I named my AirPlay device “Apple Pie Bureau“. Now, start up avahi-daemon and shairport:
1 2 | service avahi-daemon start service shairport start |
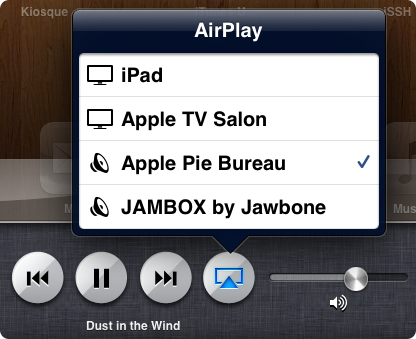
And you’re ready to rock, either form an iPhone / iPad:

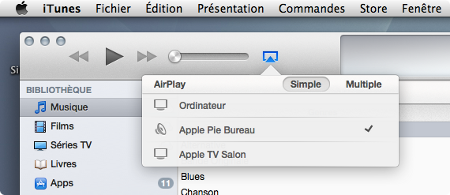
or from iTunes:

Cool 😎
Setting up AirPrint
Setting up AirPrint is about the same procedure. The idea is to set up a CUPS server, configure a shared printer and then to broadcast AirPrint stuff via avahi. The bridge between them is built upon the airprint-generate script and a few tweaks.
Let’s install CUPS (and associated printer drivers) and avahi-discover:
1 2 3 4 | apt-get install cups cups-filters cups-pdf cups-ppdc python-cups apt-get install foomatic-db-gutenprint libgutenprint2 printer-driver-gutenprint foomatic-db-compressed-ppds foomatic-db-engine foomatic-db-gutenprint foomatic-filters apt-get install avahi-discover libnss-mdns usermod -aG lpadmin pi |
Next, as usual, one has to edit CUPS configuration file (/etc/cups/cups.conf):
- Comment out the “Listen localhost:631” line
- Add the line “Port 631”. This way, printers can be added throught CUPS web interface from any host
- Add “Allow @Local” right after “Order allow, deny” for <Location /> and <Location /admin>
- start CUPS: service cups start
After connecting my AcuLaser AC1100 printer to the Raspberry Pi (and hunting for hours to get the proper drivers), I was able to access CUPS web administration interface (“https://applepie:631/admin”) and add a new shared printer.
Then comes the tricky part: bridging CUPS and Avahi:
1 2 3 4 5 6 7 8 | cd /opt mkdir airprint wget -O airprint-generate.py --no-check-certificate https://raw.github.com/tjfontaine/airprint-generate/master/airprint-generate.py chmod +x airprint-generate.py echo "image/urf urf string(0,UNIRAST)" > /usr/share/cups/mime/airprint.types echo "image/urf urf (0,UNIRAST)" > /usr/share/cups/mime/apple.types echo "image/urf application/pdf 100 pdftoraster" > /usr/share/cups/mime/airprint.convs echo "image/urf application/vnd.cups-postscript 66 pdftops" > /usr/share/cups/mime/local.convs |
1 2 3 | ./airprint-generate.py cp AirPrint-EPSON-AL-C1100.service /etc/avahi/services service avahi-daemin restart |
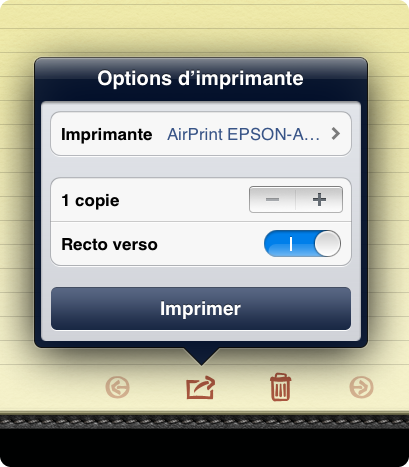
The CUPS shared printer, connected to the Raspberry Pi, is now ready to be used, either from GNU/Linux, Mac OSX or iOS devices:

Baking Apple Pies
There we go. Appart from the CUPS GNU/Linux AL-C1100 drivers (which were not easy to find and configure), it was quite easy 🙂
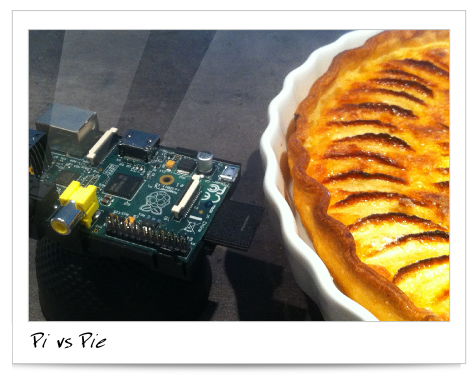
The Raspberry Pi (named ApplePie) is now set up, and ready to meet … the other freashly baked apple Pie:

Hi
Would you please share this *hard to find* driver for the acu laser c1100 ?
I found a debian installer for x86 which is not compatible with the arm 🙁
thank you
Hi,
I had to build them from sources. Here they are: Epson-ALC1100-filter-1.2.tar.gz
Have fun !
Fred
How exactly to install the AC C1100?
“sudo ./configure” => error “cups-config” missing
Hey,
Thanks so much for the Driver package!
Could you upload a installation guide for the driver though?
Thanks
@Leo: you’ll have to install the dev package for cups. It’ll depend on your GNU/Linux distribution. For Debian based distribution, apt-get install libcups2-dev should do the trick
PS: sorry for being so late to answer your question).
Dear Fred I know this post is super old but yours seems to be the only one that managed to get the epson AL-C1100 working with a raspberry pi.
I’ve downloaded the driver package you make available here. I installed all the packages necessary and sudo ./configure runs well no errors. I’m a bit of a linux noob and I can’t figure out how to install it.
The Install-sh in the package seems to require an input file and an output folder but I have no idea what that should be. The readme files seem to be the original ones and still mention the rpm installation of the i386 rpms.
Could you lend me a hand here? It would help me a lot!
Thank you so much in advance!
Rui