| It’s been two long weeks, but the Rasberry Pi I ordered finally arrived this friday. I’m extremely excited with this tiny thing. Just like messing with my first computer (30 years ago…) or patching a Linux kernel for the first time. Yep, I really do feel like a kid 🙂 |
 |
Raspberry Pi
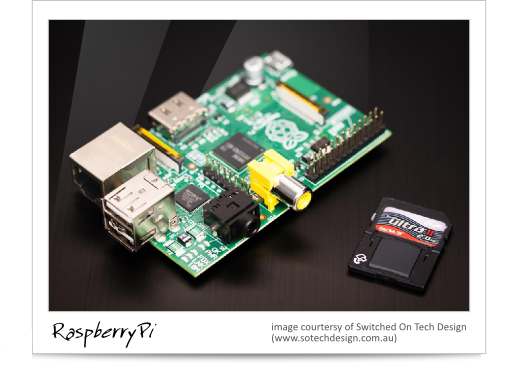
The Raspberry Pi is a credit-card-sized computer developed in the UK by the Raspberry Pi Foundation. Though it is designed with the intention of promoting the teaching of computer science in schools, its ability to run GNU/Linux, combined with its GPIO make it one of the greatest general purpose device ever. Its been hacked into a robotic arm with voice recognition, home automation devices, and even a super computer !

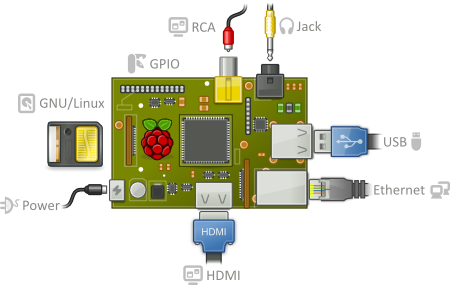
Technically speaking, for around 30 €, it packs:
- A Broadcom ARM Based SoC
- 512MG of SDRAM
- A 10/100 ethernet RJ45 connector
- Two USB ports
- Video outputs (HDMI & RCA)
- Audio outputs (Jack & HDMI)
- A GPIO Bus
- A SD / MMC / SDIO card slot for onboard storage
- A MicroUSB 5V power source
It goes like this:

Unboxing et initial setup
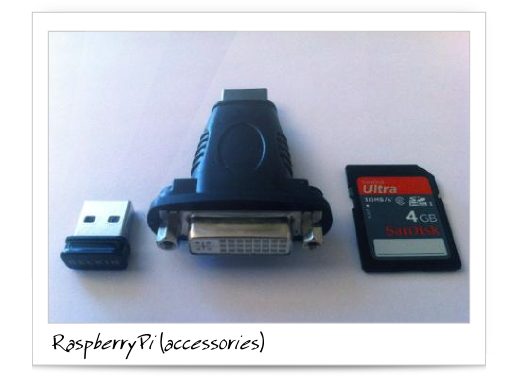
One is immediately struck by how small the Raspberry Pi is. It fits easily in a 8.5 cm x 5.5 x 2 cm box. Appart from the board itself, I bought online a Micro USB power supply and black moulded plastic case. The equipment is completed with a HDM/VDI converter, a 4Gb SDHC Card and a Wifi USB adapter:

I chose:
- A Belkin SURF N150 USB Micro-Adapter
- A 4GB SanDisk SDHC card
First things first:one has to download an Operating System distribution and then copy it to the SD Card. I chose the Raspbian Wheezy image, since I’m far more efficient with Debian-based GNU/Linux distributions.
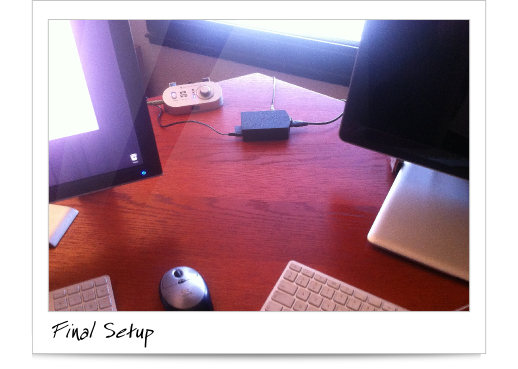
Thanks to the HDMI/VDI adapter, I hooked up the HDMI video output to a 22″ 16/9 LCD screen. The board was then connected to my home network through the ethernet link, I hooked up a USB (Apple) keyboard and fired up. A few leds blinks later, GNU/Linux booted up and the initial setup (raspi-config) was automatically launched:

I chose:
- to expand the initial 2GB root partition to fill the whole 4GB SD Card
- to enable the SSH server
- to configure the time zone, locale and keyboard
- to change the password for the default user (pi)
- not to start the desktop on boot
- not to overclock (yet)
… and then got access to the little rascal 🙂
It got its network configuration from my DHCP server and was able to upgrade the system:
1 2 | apt-get update apt-get upgrade -u |
Then I changed the name of the device. Since the first hacks I was going for were about setting AirPlay and AirPrint, I baptized the device ApplePie:
1 2 | vi /etc/hostname vi /etc/hosts |
I plugged in the Belkin wireless adapter, with was recognized right away 🙂
I got its MAC address:
1 | ifconfig wlan0 |
Which I was added to my wifi Access Point MAC access whitelist. Then a tried a manual connection (WPA disabled):
1 | iwconfig wlan0 essid quantum-bits |
Which also worked right away :). I enabled WPA protection back, edited the usual Debian network configuration files (/etc/networks/interfaces, etc.), added an entry for “applepie” in my local DNS and reconfigured my DHCP daemon to serve a static IP to WiFi MAC address of device (since I also want to turn the Raspberry Pi into a small PHP server).
Then I unhooked the ethernet cable, the HDMI connector and the keyboard, halted the system from a SSH connection, put the board into its case:

Et voilà ! The little fellow is ready to be hacked into a PHP server, a AirPrint server, a wireless AirPlay (and probably later a Siri Proxy).
And then I cooked a (real) apple Pie to celebrate 🙂
